I’m often asked about the editing workflow that I use for editing the go pro footage and drone footage that I take on my fishing trips. Over the years, the workflows have changed extensively and the techniques I’ve used to combine different resolution video files from different sources has evolved around the advancements in cameras and editing software. Where once the holy grail of editing was a nicely compiled NTSC broadcast quality DVD, today is a 1080P web file with down sampled 4K footage or a breathtaking 4k Master file on a big 4k monitor which is now becoming commonplace in living rooms. Seeing a 4k resolution fishing video on an 80 inch is the next best thing to being there. I don’t see things getting better that this unless we can achieve 4k VR (360 degree video) in my lifetime. DVDs and 8mm hd firewire camcorders are now ancient history and gather dust on my shelves. . Iphone and GoPro cameras have made 1080p the standard in video resolution and 4K resolution recordings are now the standard for mainstream commercial media. Computers, video cards and monitors are finally working well together and can easily support 4k .
Even the latest fishing electronics have become very sophisticated. My boat has the highest resolution 3d bottom scanning radar on a 12 inch screen as well as a 360 degree sonar. GoPro Technology is already performing well at 4K and the latest models are waterproof out of the box . The GoPro Session series cameras are so small that they can even fit inside a fishes mouth. Fisherman everywhere are mounting them on their hats,and on their rods. and in front of trolled lures. WIth the new and exciting aerial HD Drones like the Mavic and the Spark, the emergence of Underwater drones like the soon to be released Trident, and the ability to do 360 video with the Nikon KeyMission 360. there is no where a fish can swim that it cant be filmed. and there is no angle or perspective that cant be explored.
GO 1080p, GO small, waterproof and light, GOPRO
If ever there was a camera that was made for a fishermen, it is the GOPRO. Not only is it waterproof, small and light and easily carried, worn on the stream, or mounted on a boat, it has a function set that is ideal for self filming and event capture with a minimum of wasted storage and menu selections. The ability to turn the camera on and off with a wireless remote or smartphone makes taking selfies, and turning on and off the camera a snap. GOPRO’s take 11 megapixel stills in raw and jpg and advance photo editing software such as Adobe Photoshop and Lightroom support the GOPRO lens which comes in handy when you want to take the “fisheye” out of stills. The lens on a GOPRO has a 90 to 127 degree field of view which captures the action even on a small boat with wide angle shots in close proximity. There is just not that much room in an 18 foot boat to move back to in order to get the Rod bending and fish jumping in the same frame but the GOPRO can capture shots like that easily. Tv shows like Wicked Tuna and Deadliest Catch are almost exclusively shot with GOPRO cameras.
GOPROS have some of the most imaginative mounts of any camera in history, In my boat, I use magnetic connectors to connect the Gopro to various mounts. The reason for this is so I can easily and quickly change the position of a camera while fighting a fish with one hand by pulling it off the magnet and sticking it on another.. After 200 films of catching fish, one starts wondering what new camera perspectives are possible just to make things interesting. The mounting system in my boat allows for a nearly unlimited positions for the camera and consist of clipable windshield mounts, Scotty Camera Mount accessories, all locatable over 4 12 volt receptacles in each corner of the boat. The GOPRO can be connected to the boats batteries and run all day off of external power. With most GoPros, all one needs is a mini usb cable or a GoPro Battery Eliminator hooked to a 12 volt usb power supply. When moving them around, during the action, one simply unplugs the external power, pulls the camera from its magnetic mount and puts it on another. magnetic mount. I also have a 2 foot boom mount that swings out from the boat point toward the boat that can fit into a Scotty Boat accessory ports which are located on the gunnel at 2 foot increments around the boat. I also have a weighted low profile tripod which allows me to place a GOPRO in a stripping basket pointing upwards (a great tip from Ray Hutcherson). or anywhere on the boat on a flat surface. In addition, I have a long boom made from a boat pole that can be place in a rod holder tube. The boom is the longest mount in the boat and it can be placed straight up in the air ten feet or out to the side pointing in . The boat looks like a trawler with the ten foot pole out to the side and your going to get some weird looks but the video is spectacular. In emergencies, it still has utility as a boat pole as well. Also, I have a 3 foot telescopic pole mount with a filtered underwater casing that I use for under water shots and shots in the water film from outside in. This mount is great for filming releases where you can follow the fish from unhooking to revival to release and away. Also great for filming fly movement. Ten years ago, put my Nikon in an aquarium and lowered it into the water for that shot. I use to think that a viewfinder was a critical element of a camera, but once you edit enough film, you get the feel for framing. I call it shot gunning. Move the camera slowly close to far and from different angles as if you were shooting stills in burst mode. It almost as fun as catching the fish if you get great footage of the whole process. Almost like catching the fish all over again.
The GOPROS also have great utility in the field. In Alberta, and Christmas Island, there are times when you need to walk long distances, I use to lug a 30 lb backpack with camera equipment and tripods over my fishing vest if I wanted high quality footage on the river or flats. The best thing ever made for GOPROs in the field is the telescopic light weight tripod. They break down and set up quickly like a wading staff and can be worn on the beat with camera like a landing net or wading staff. If you see an opportunity for a shot one simply pulls the tripod out of a belt clip or holster and the tripod depots by itself. Set the camera up and get in front of it and catch the fish. The tripods can also be used as a pole for underwater shots. Filming inverted is easily flipped in post production so the whole process can be filmed in one session from casting, to hooking, to playing , to landing from underwater, to release all with the same tripod. The GOPROs are so small, you can carry several of them and a small micro 4/3 still camera in a belt pack with fly boxes and equipment with not too much bulk or weight.
Certain Gopros have the ability to LOOP Record. I use the Gorpo 3’s and 3+s the most. This feature is very important in fishing because it allows us to capture just the moments that we need without shooting hours and hours of footage for 5 minutes of what we want. Loop recording was originally developed for Dash Cams on cars. The camera would record in a 5 minute loop until a button was pressed at which time it would save the last 5 minutes permanently and start recording another 5 minute loop. You can pick your interval on a GoPRO from 5 minutes, to 20 minutes to the whole memory card. I have found through experience that 5 minutes is ideal for fishing since the typical fish I cast to , hook , and land takes less than 5 minutes. In the event that you hook a 30 minute fish, you have to remind yourself to hit the button twice every 5 minutes. A countdown timer preset to 4 minutes on your watch helps with this if you need especially if you want to record more than landing the fish. Another method I use is having another camera on a mount that is not set to loop mode and as soon as I hook an over 5 minute fish, I just press stop on the loop camera and start on the continuous camera till I’m done releasing the fish. The only downside of loop mode is that you can’t use PROTUNE which records a richer 1080p stream that can be better enhanced in editing software. If you have a second camera not set to loop, turn protein on. I film in WIDE, 1080p 30 frames in loop mode typically. Slow motion video is always better in 60fps but Its rare when I use it and the software can build beautiful slow motion from 30FPS with software like Final Cut and Premier.
Watching NFL Films for years which revolutionized the way sports films are edited and filmed, most film shot is not real time but in slow motion. Something about slow motion really engages a viewer. Fishing is not exception to this style. Shooting the GOPROS 60 FPS instead of 30FPS and then “conforming “ the clips in Final Cut or Premier puts all your footage in high quality slow motion. You can still slow motion 30 FPS but the quality is a bit better in 60 FPS especially in very fast moving scenes like Tarpon insanity and reels spinning.
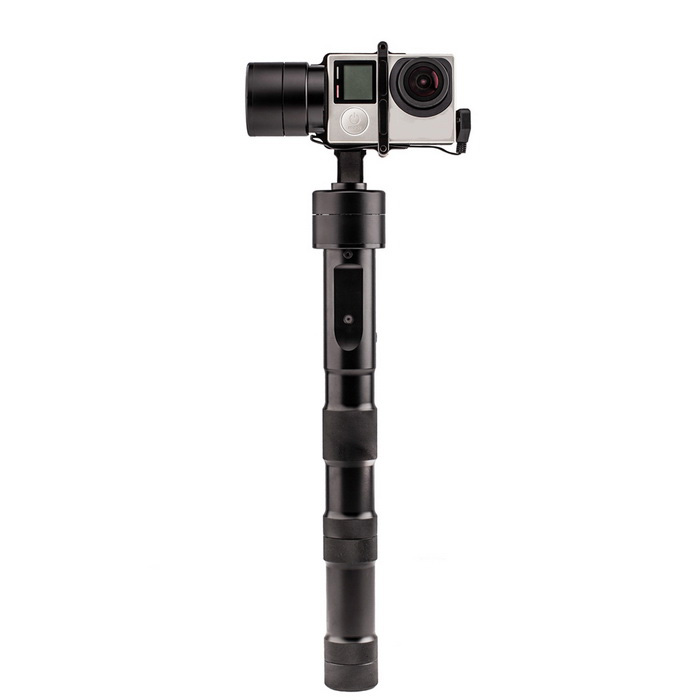
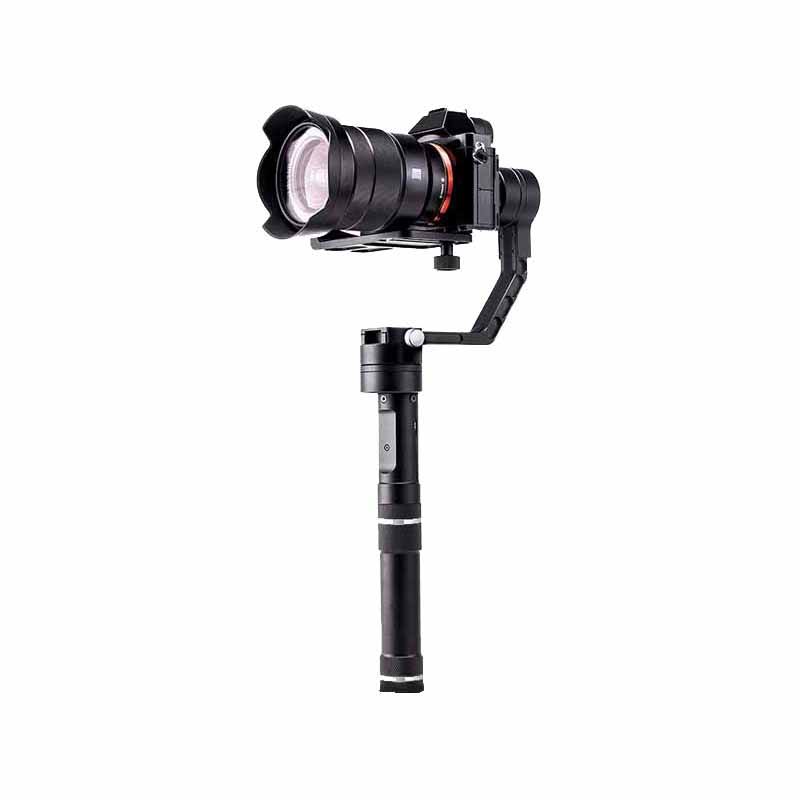
One big problem with small video cameras in the past was the inability to take steady shots when moving with them. My older fishing footage taken 20 years ago use to make my dad seasick to the point of vomiting and I thought they were pretty steady. Today, there are numerous inexpensive steady cam gimbals for GOPRO that mimic the most expensive steady cams on the market. As of the writing of this article, I currently use the Evo GP Pro Gimbal which can hold any on the GoPro cameras with the right mount and utilizes. There are many gimbles on the market but there are two reasons that make this gimbal supreior, One, it utilizes standard 18650 3.7v standard Rechargeable Lithium Batteries and .two, it allows one to power the camera from the gimbal batteries extending you video time by 3X. When filming on a boat all day, you need an external battery source that will extend your loop recording at least 6 hours. The best on on the market in my opinion with the most mAh it the FatBat by Cuba which is powered by the same 18650 batteries. In addition to the FatBat, there are many external USB batteries packs that utilize 2,3 or 4 18650 batteries. In addition to using them to charge equipment, they can be recharged in the case which saves space carrying chargers. Having the same batteries to recharge you cameras, steadycams, cell phones and other USB charged devices has its advantages when you are trying to travel light. I also acquired a Zhiyun-Tech Crane v2 3-Axis Handheld Gimbal Stabilizer for my GH5 .
I use to think that one had to carry two cameras while fishing just in case that unique still photo op came about. I didn’t have faith in the stills that the GOPRO takes. In the past several years of shooting GOPROS, the best stills I have taken have been frame grabs from HD GOPRO footage. Every still frame of GOPRO 1080p is a 2 megapixel still! After frame grabbing them using simple programs like VLC or Quicktime, Massaging them in Lightroom and or Photoshop gives you stills taken exactly at the right time, with perfect framing and deep rich detail and saturation. How many times have you hit the self timer and got a great picture of a fish in the air and you looking like a dork with your eyes closed and the fish flopping out of your hands. Shooting sports for years, Ive learned some tricks that help to get that great shot. Anticipate the action, shoot burst before it happens (don’t let up on the shutter) and follow the subject for a few more seconds after what you are aiming for just in case something unusual happens. Yes you’ve taken 20 shots, but you only pick one, and its at the exact right moment. By taking frame grabs of video, you can capture the moment that the 30 lb striper inhales a 6 inch pole dancer. or the exact moment you put the Boga on the biggest fish of your life as long as its on and pointing in that direction. Try doing that with a timed selfie. On the downside, you are taking a 3 megapixel pics with a GoPRO vs an 11 megapixal pic from a still camera with full manual control over the exposure and settings. But from my examples in the past, most of the pictures I use are for the web, or small enlargements and I have achieved some stunning results from 1080P GOPRO stills and even Iphone pics. It’s way better to capture the moment than to have the opportunity to enlarge. But, there are even ways to enhance and enlarge GOPRO stills for great results. Software like Onone Perfect Photo Suite (previously Fractal Design) can enlarge with virtually no detail loss.
Frame grabbing video is such a great way to shoot fishing that most my cameras now have a function called 4K Photo.
4K Photo is really a form of burst shooting. This differs from the “continuous” or “high speed” capture offered by Lumix cameras which is often around 12fps – because that function is using the full resolution of the sensor, for example, 16 megapixels. What 4K Photo offers is faster capture at 30 frames a second, which is much more impressive and able to freeze fast moving action in a way that 12fps can’t. Take for example a tarpon or dorado jumping – 4K Photo is a better option, because you’re much more likely to freeze the action in that scene. Each 4k grab can make sharp perfect 8 megapixel pics that can even be blown up to 8 by 10 beautifully.
Although my Nikons gather dust with the myriad of expensive glass Ive collected over the years, I haven’t abandoned high end still photography in fishing. The next innovation that has changed fishing photography is the the Micro 4/3s camera. Basically, they are small high quality, interchangeable lens still cameras. Today, many professional photographers have moved from NIKON and CANON 35mm DSLR to Panasonic and Olympus Micro 4/3 cameras. I own is a Panasonic GH5, a GX8, an LX100 and a GF5 Each of these cameras have advantages that are not shared by the other cameras when it comes to FlyFishing.
The Lumix GH5 is the latest and best mico 4/3 cam on the market. It is weather sealed (great for fishing) and is the only prosumer cam that can do 6K photo. GH5 is one of the most adept 4K capture devices available today, capable of shooting up to 4K at 60fps. It also has two SD slots for week long trips and it takes great photos as well as accommodates the myriad of lens I have collected.
THe GX8 is a GH4 in a smaller weather sealed body. Because of its size and the fact that it is a true micro 4/3, it fits in my fishing vest or fanny pack and is a versatile camera for running and gunning. The GX8 was the first Micro Four Thirds camera to leave the world of 16 Megapixel sensors behind, moving to 20MP. In addition, it has super fast focus, superior stabilization, and a fully articulated screen so you can video or take pictures of yourself and your catch on the shore or boat with control. The Gx8 is unique because it is a small camera capable of 4K Photo selfies in a small weather sealed package.
The LX100 fills the need for a small pocketable camera with a long built in high quality lens (24-75mm – 35mm Equivalent). The LX100 is the camera of choice for someone who is looking for a travel camera. The Panasonic Lumix LX100 lens is quite remarkable. With a maximum aperture of f/1.7 when shooting wide open, you have great control over the depth of field for a camera of this size, and comparatively excellent low-light performance. It uses a 16.8-megapixel Micro Four Thirds sensor which allows it to record 4K video at 30 and 24 frames per second as well as maximum 60 frames per second in 1080P. It does 4K photo and fits in the palm of your hand. I think its the tiniest, high quality, full sensor, long lens compact you can buy. if you just want a camera in your pocket thats not your phone.
I am in awe of professional fly fishing photographers, I know several and they shoot with passion and vision, but they don’t fish when they do it. For the most part, I fish and I still want that moment on film. But there is as much joy for me, just filming and shooting stills of a good friend and not fishing. The last three funerals I attended of fishing buddies that went to that trout stream in the sky, used one of my photos as “that” photo next to the flowers. It made me think that every time I hit the shutter, this could be ” that “ photo. I morbidly digress but Im feeling old. . When I started out shooting fly fishing the goal was to copy the masters, I wasn’t sure what a great photo was and started collecting photos that I liked on my phone. I would scroll though them before shooting a session just to remind me how to look through the viewfinder. Instagram is a wonderful tool to study what makes a fishing photo great or boring. Sometimes, its the water dripping from the fish, or the direction of the sun,. Other times its actually the fish not looking dead, limp and pissed off. Small techniques like a small shake of a fish gets there attention and all the fins pop out. Fishing alone most of the time, Ive developed a method to optimize the chance for that great photo without hiring a photographer to follow you around. Still grabs from GOPRO is the answer.
THE DRONES
The latest and greatest accessory for flyfishing is the Drone. With all the sick and twisted misshaps with drones in the press today. I fear a few idiots will ruin it for all of us. Anything that needs a bit of common sense to operate in this country is subject to regulation. I hope using drones doesn’t come down to a second amendment issue. Today, drones need to be registered, there is new legislation monitoring drones, some foreign governments are also regulating drones and you must buy insurance if you want to fly in Canada. The easiest way to get insurance for your drone is to join the AMA -Academy of Model Aeronautics. With a yearly $75 dollar membership, you get $2.5 Million Liability Umbrella, $25,000 Medical Coverage and $1,000 Fire and Theft Coverage. Buy it seperately and it would be more than $1000 dollars a year. Drone technology is growing and there is no stopping it now. Drones are creating a $100 billion market opportunity too large to ignore – based on research from Goldman Sachs.
For the most part, using drones in fishing is very benign and safe. When you are on the water or far from the crowds, it is erasier to fly a drone safely and not freak people out that you are spying on them. One exception recently was when I put a bunch of feeding trout down by hovering 100 feet above them . Apparently the drone mimics an osprey when it hovers over a fish. It is still essential to ask an angler for permission before filming. Drones today have the ability to hover with the stability of an aerial tripod without having to have your hands on the controller. Some can be programmed to follow you around. Its not that difficult to film yourself with a drone but the challenge is the battery life of the drone and landing one in a boat. The typical drone battery lasts about 20 minutes which means you can launch point and hover one for 15 minutes before you have 5 minutes to bring it home safely and land. Two words – performance anxiety.
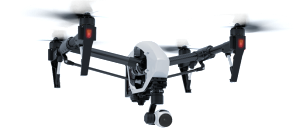
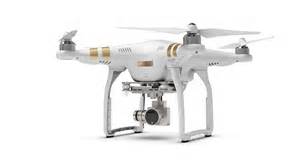
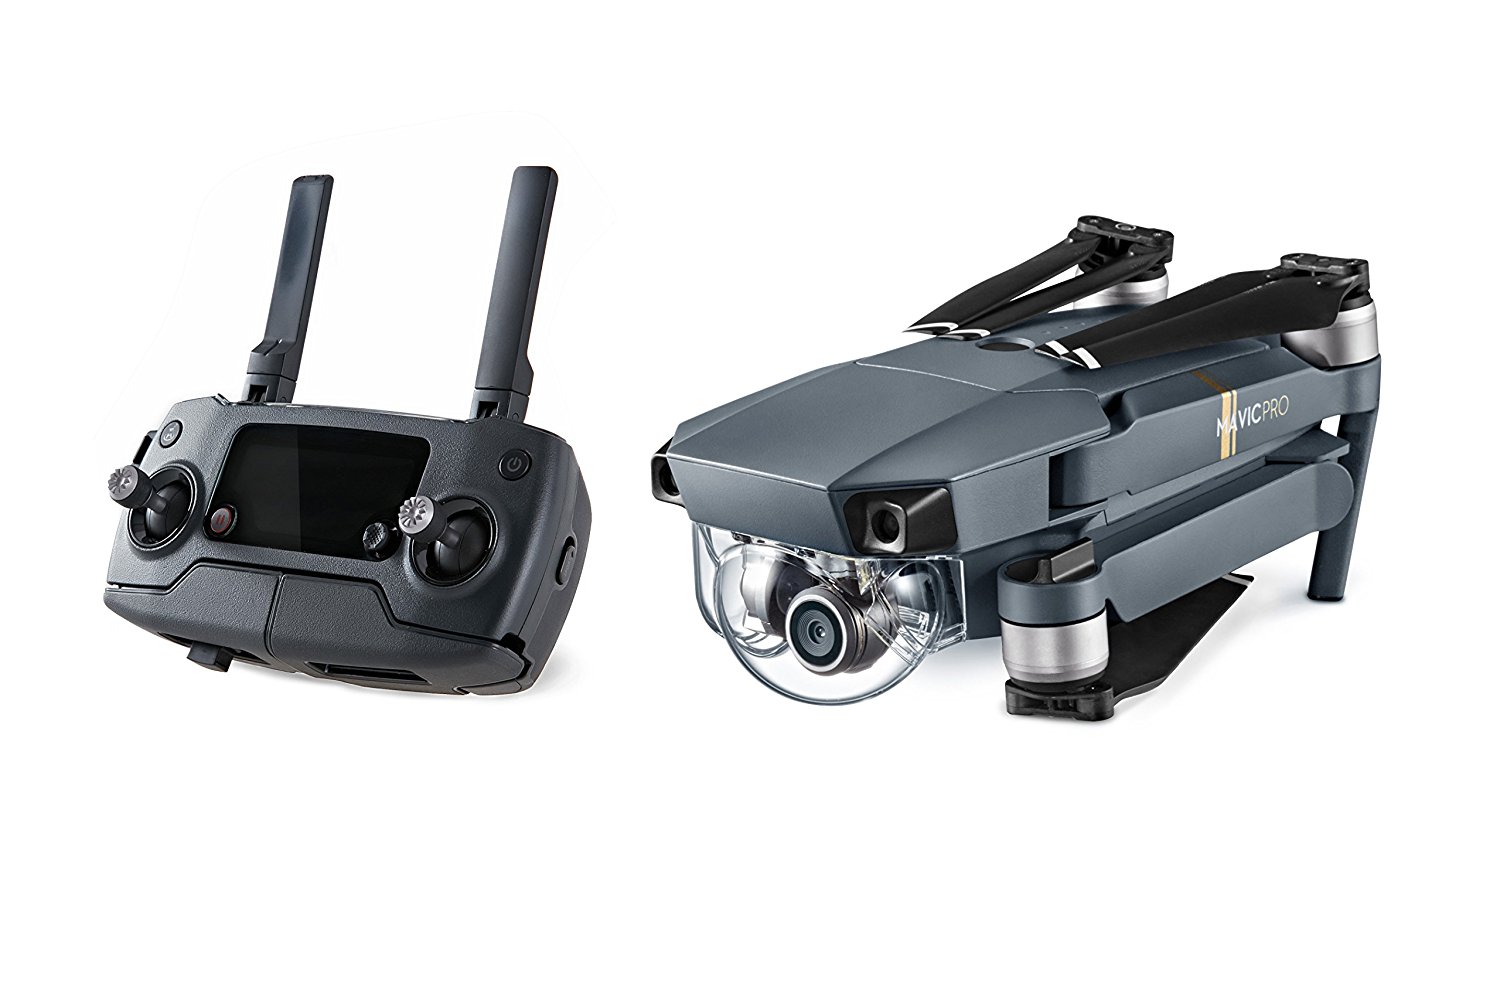
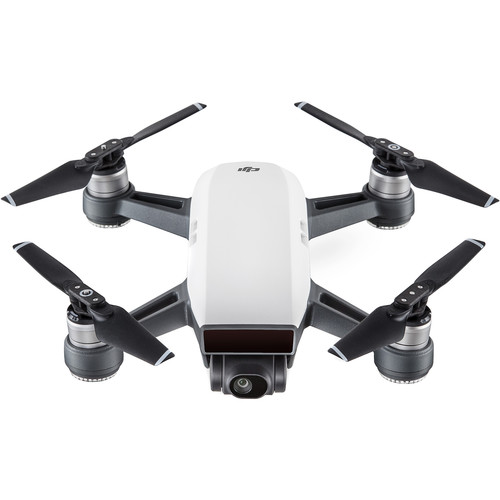
Landing drones in my boat has been one of the most exciting and risky things I’ve done in the last year. With some of the drones worth upwards of 3k, one mistake is a thousand dollar mistake. I own 4 main drones . The Inspire 1 for heavy lifting, stability in wind, dual operation, the Phantom 3 Gold, the Mavic Pro (my current goto fishing and traveling drone) and the DJI Sprint whcih I will write about soon. I have a new paradigm when it comes to drones, boats and flyfishing. The best shots I can take with a drone are actually aerial close ups within casting range —about 150 feet. You can really get a sense of the cast and the fish when close. I also like the aerial pans from high up but you only need a couple minutes of that for effect. Straight down shots are also great. Shooting in 4k is essential also since you can crop into a 4k video on a 1080p editing setting and get great closeup quality. It is risky business flying that close since nailing it with Clouser on a cast will surely drop it from the sky. But getting a shot of a cast that gets close to the lens is money. No risk no gain. The most accurate landings for my drones resemble controlled crashes. With the boat moving and a cross wind blowing, landing the drone on a dime gets difficult. The fail safe on the drones allows them to fly back to where they launched in the event of a transmitter malfunction or communication failure, but that last ” home point” is usually in water behind you where your boat was but isn’t anymore. The latest software improvement now update the return to home GPS coordinate to the controller itself. There is no way to automate landing on a moving boat yet. The best way to safely get the drone back on boat is to actually hover it above your head, reach up and grab a rail, and cut the power with your left hand. This technique is great for phantom class drones since they are lighter and have a nice landing gear to grab but with the Inspire One it is like reaching up and snatching a food processor out of air, You can’t see the blades turning either and one nick of the prop and you are chumming for shark. Still its the best way to get an Inspire One in the boat safely. I now use a leather glove on my right hand while raising the landing gear before grabbing the undercarriage as it hovers over me. The Phantom Three, Mavic Pro and Sprint are great boat drone. All have the capablitiy of transmitting 1080p live images to a large Iphone, Ipad on the new DJI Goggles. plently clear enough to see those cruising trout or birds crashing bait two miles away. DJI Software has entered its 4 generation with built in flight zones, automated flight patterns and autoupdating home points. which are awesome features when it comes to filming fishing.
All of the GoPro cameras have no problems transmitting a signal beyond line of site. Even the small Sprint has a 1.6km range on instruments. Most fishing film applications are closer to the boat and thus, all the models can perform flawlessly in that application. I did have an interesting issue when I discovered while in flight, that the Mavic Pro out of the box frequency interferes with my wireless Minn Kota Terrova remote. It became a problem when I tried to hold my boat in current while trying to hand catch the drone. Now I have a feel of what pilots have to do to land on a moving air craft carrier. Its easy to change the transmitter frequency in the GoPro app so both devices work simultaneously.
The Day Workflow
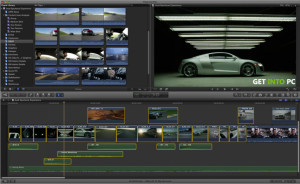
I try to fish weekly and the goal with film editing is to finish the evening of the trip. The first think I do is move all the footage to Final Cut Pro . To organize the files, it is a great idea to sync the clocks on the GoPros at the beginning of the day so that the files dates and times are chronological. All cameras should ideally should be time synced for convenience. If you haven’t done this and you are editing clips from two different cameras, you will have to figure out the difference between the cameras and do the math while working if you want to edit the day as it happened.. Keep all the cameras on in Loop mode and when you catch a fish, hit the top button two times, once to capture the last 5 minutes and one to start the next 5 minutes. At the end of the day you will note that most of the files will be grouped in 5 consecutive numbers from the file names representing one minute of a total of 5 minutes. . The exception is if you loop two consecutive 5 minute intervals. Say you record 5 minutes, hit the stop button twice and then hit the stop button again after 5 minutes.. All the files will be consecutive 1 thru 10. If you recored 5 minutes and then half an hour goes buy before you hit stop, there will be a gap between the sets , for instance 1-5 and 7-11. I like to scrub the last files in each series to see if the fish is worthy of editing. Of the 30 or so fish you might have caught that day, you might only want to edit the biggest three so pursuing the last file in each set will help you identify them.
Lay down the music track first and then mark the beat maks (select music, play and hit the m key on each beat). Laying down the edits on the beat is a basic film editing technique. Then lay the film down on the edit line. I like to try to keep the edits short (the length of one song) although I never get bored of watching an old fishing trip but others do Im sure. You usually will have much more footage than your music. Dont freak out about condensing two hours of film into 3 minutes. Thats what editing is about–using only as much clip as it takes to tell the story. Once you lay it all down, go to the beginning and start shortening each selected event on film capturing the essence of each fish or action. You can slow and speed up segments to force the footage to fit into the music beats. The rest is personal preference and is what makes editing fun. There are lots of sources for free royalty music out there. I like audioblocks.com and freemusicarchive,org. Or, take a chance and use what music you like, if you are not using the music to make money –say in a fishing report that is actually considered to be “NEWS”, I think the fair use laws permit it especially if you are not making the film for profit. I have challenged the fair use laws and been permitted to use copyrighted music for non profit fishing reports successfully. on YouTube, I prefer to upload to Vimeo because it supports higher quality formats in a more user friendly way. You can also use Youtube,. Learn to embed video code into facebook or your blog to include your vids on your favorite pages.
360 Video and the Nikon KeyMission
Now it is possible to film two people catching fish at each end of the boat with one camera. Some say this is the age of VR. Virtual Reality content creators have traditionally used multi camera rigs utilizing multiple GoPros. Last year Nikon released a camera capable of capturing not just the view in front of your eyes, but the entire world around you—in every direction—as lifelike 360° 4K Ultra HD video. WIth the use of a VR system like the HTC Vive, I am able to view these videos and edits like I was standing in the boat and looking around. The quality is still pretty standard definition, but the technology is getting better higher resolution each year. Its cool to watch a video many times from different perspectives. The Keymission is waterproof so I cant wait for the release of the Trident drone to try it out underwater. Im a bit worried there isn’t enough light down under to get truly crisp video..
3D Fishing VIdeos.
d
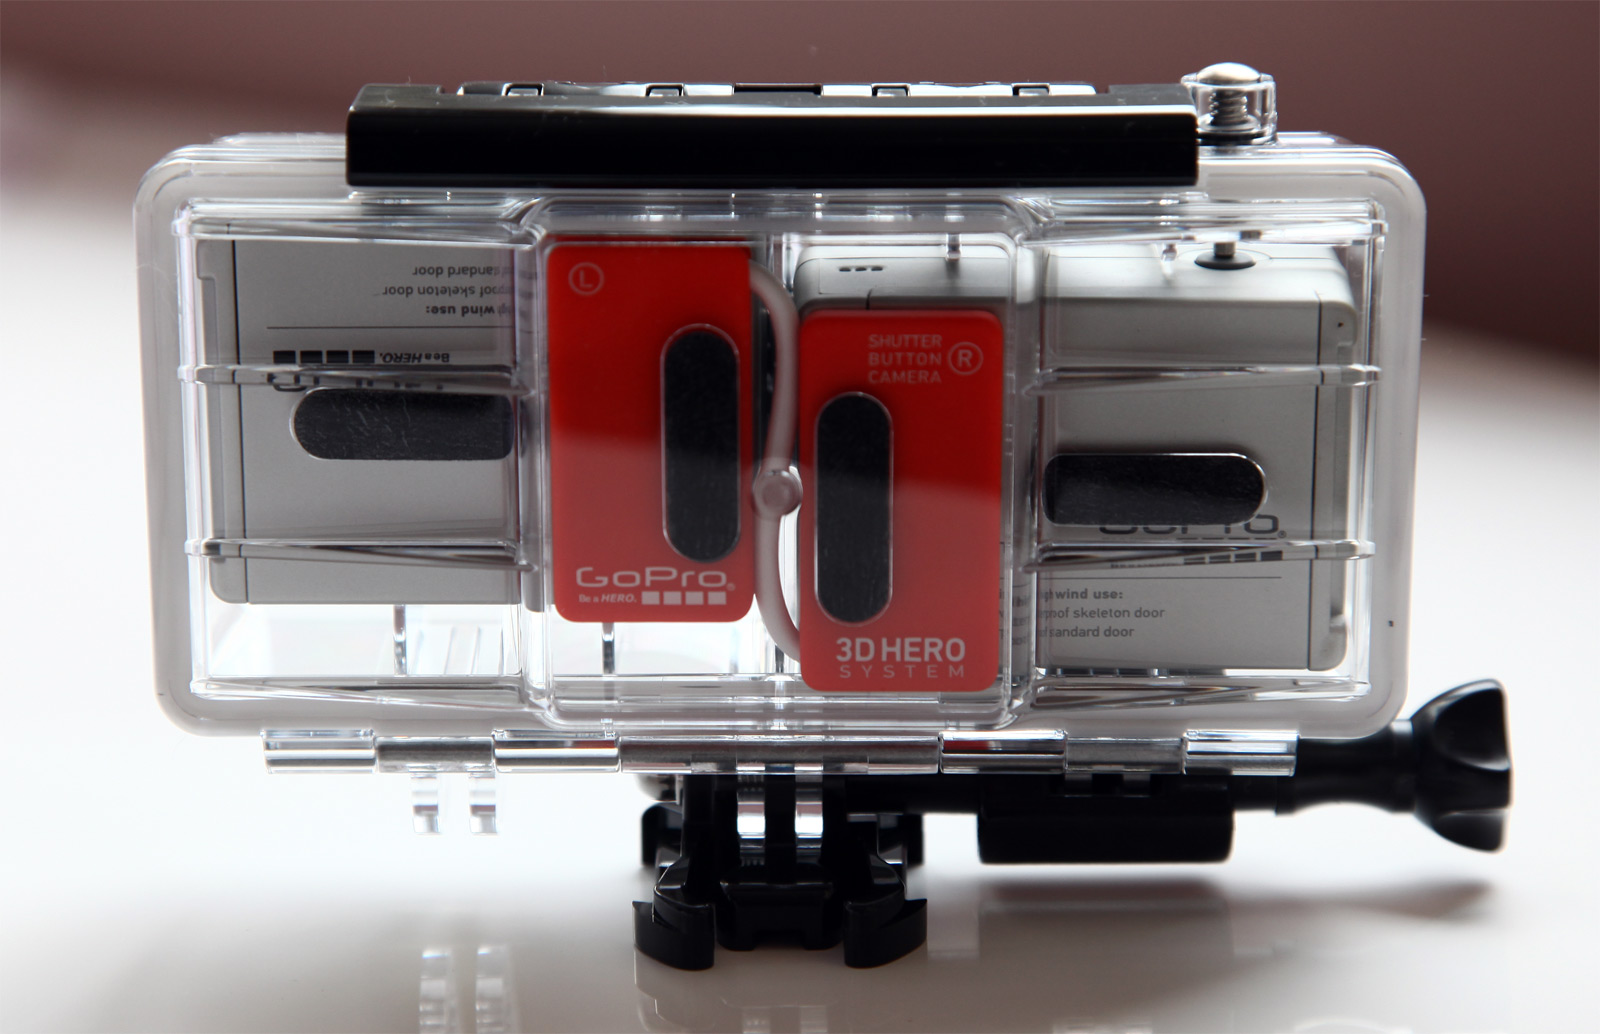
Years ago I put together a 3D rig for a pair of Hero 2’s. 3d fishing videos are fun to shoot and great on a big screen.. Gopro has mainly concentrated on multi camera rigs for 360 but they still do offer an upgraded Hero 3+ dual camera setup that will shoot 3D that can be edited in GoPro Studio.
3 thoughts on “Fishing Video Equipment and Workflows”
That was a fantastic and in-depth over view of using drones on a boat. Thank you.
regards D from queenslandaerialdrones AKA SkyBiz Australia.
Hi, I found your post on Google. I just purchased Goprro hero 3+ black. I want to use it for Flyfishing and don’t know what would be the right speed to use. I would like to take the footage and make a Short film with action shots and music. Thanks for your help, it would be nice to get advice from an expert. Tom
I just purchase one of those 3+s also. Typically, I like to shoot 1080P wide 30fps in loop mode 5 minutes. For best quality and ability for better slow motion, I would recommend turning protune on and shooting at 60fps because in post production (editing with final cut pro) you can better tweak the color and contrast in protune. Also in 60fps, you can go half speed with no quality loss by conforming the footage (read about conforming 60fps). Slow motion in 60fps is a bit better than slowing 30fps. All that said, slow motion is a rare event if your taking a footage of a jumping fish or casting or a trout rise. If you can set it up and its a planned event, you are a better fishermen than I. I would go for wide setting and 60fps, protune on, and maybe even 4K if you could time the event. I use to try doing that but it always jinxed me. Fishing is unpredictable and linear, so I like to keep the camera on ALL THE TIME in loop mode while fishing. You never know when its going to happen. Your films will typically be only be 3-5 minutes at most so you are trying to capture only .01 percent of something interesting (at least to us). 30fps gives you more capacity so it will allow you to capture more (a bigger net). Also, you can not use Protune in loop mode. The 3+ has some new stuff. The ultrawide view is nice–I will use it. Also, the auto low light is usefull in early morning and late evening when we fish. I have been using a post production plugin called Twixtor for slowing down 30fps and it looks great so not too big a loss not shooting in 60fps. Also, to compensate for color issues due to overexposures and radical light changes, I put a polorizing filter on the unit. There are lots of aftermarket cases and attachments that allow you to screw a filter on the Gopro Hero 3+ which is exactly the same formfactor as the Hero 3. On long hikes, I carry a the hero on a folding tripod so I can pull it easily out of my fanny pack water holder, set it up, and turn it on. You can also use the tripod as a monopod to film the fish underwater–just grab the tripod legs and hold them together and put the camera upside down in the water. Don’t worry about filming upside down and trying to reset the camera while fighting a fish). You can flip it later in editing software. Its great fun!


 d
d
That was a fantastic and in-depth over view of using drones on a boat. Thank you.
regards D from queenslandaerialdrones AKA SkyBiz Australia.
Hi, I found your post on Google. I just purchased Goprro hero 3+ black. I want to use it for Flyfishing and don’t know what would be the right speed to use. I would like to take the footage and make a Short film with action shots and music. Thanks for your help, it would be nice to get advice from an expert. Tom
I just purchase one of those 3+s also. Typically, I like to shoot 1080P wide 30fps in loop mode 5 minutes. For best quality and ability for better slow motion, I would recommend turning protune on and shooting at 60fps because in post production (editing with final cut pro) you can better tweak the color and contrast in protune. Also in 60fps, you can go half speed with no quality loss by conforming the footage (read about conforming 60fps). Slow motion in 60fps is a bit better than slowing 30fps. All that said, slow motion is a rare event if your taking a footage of a jumping fish or casting or a trout rise. If you can set it up and its a planned event, you are a better fishermen than I. I would go for wide setting and 60fps, protune on, and maybe even 4K if you could time the event. I use to try doing that but it always jinxed me. Fishing is unpredictable and linear, so I like to keep the camera on ALL THE TIME in loop mode while fishing. You never know when its going to happen. Your films will typically be only be 3-5 minutes at most so you are trying to capture only .01 percent of something interesting (at least to us). 30fps gives you more capacity so it will allow you to capture more (a bigger net). Also, you can not use Protune in loop mode. The 3+ has some new stuff. The ultrawide view is nice–I will use it. Also, the auto low light is usefull in early morning and late evening when we fish. I have been using a post production plugin called Twixtor for slowing down 30fps and it looks great so not too big a loss not shooting in 60fps. Also, to compensate for color issues due to overexposures and radical light changes, I put a polorizing filter on the unit. There are lots of aftermarket cases and attachments that allow you to screw a filter on the Gopro Hero 3+ which is exactly the same formfactor as the Hero 3. On long hikes, I carry a the hero on a folding tripod so I can pull it easily out of my fanny pack water holder, set it up, and turn it on. You can also use the tripod as a monopod to film the fish underwater–just grab the tripod legs and hold them together and put the camera upside down in the water. Don’t worry about filming upside down and trying to reset the camera while fighting a fish). You can flip it later in editing software. Its great fun!